On-site OAuth with the Public API
This guide describes how to use the Zephr Public API to add social sign-in to your site.
The use-case for this guide is specifically where a front-end developer needs to integrate OAuth directly – without using the standard Zephr forms. If you use the Zephr CDN and forms powered by Zephr, you can turn on social sign-in without any code, see our OAuth 2.0 page for details.
Understanding the OAuth flow
The OAuth 2.0 flow is fairly complex and has a number of variants. You can read about the details of the protocol here. Zephr uses the “authorization code” grant type.
The essence of the flow is that the site never sees any credentials but can verify that the user is “authentic” by asking the user to provide a token which the social platform can validate.
In practice, the flow is a little more complex and state management can be tricky.
Using Zephr to implement OAuth
Zephr attempts to simplify the implementation of the OAuth 2.0 flow by both managing the state and the communication with the social platform.
Using Zephr, the site needs to do two things. First, it must open a window / tab on a specific Zephr URL, which will start the flow. The social platform’s login and permission UI will be displayed in that window. Once the user has authorized the site, Zephr will send a message to the parent window with the result before closing the child window; so the site must also listen for the message from Zephr and action it.
Authentication flow end states
The message at the end of the flow will dictate one of three states:
- Failure – the user has not permitted access
- Login – the user has authenticated and already had an account
- Partial registration – the user has authenticated but does not have an account
In the case of a partial registration, the site must make a subsequent request to the Zephr Public API to register the user (including providing any required fields set up in the user schema); the registration request will include a token, provided by Zephr, as the validator.
Prerequisites
In order to use social sign-in you must first get client credentials for the site. The process for getting these values varies between providers but is well documented, and can be found with the following links:
Make sure that you have set up the appropriate callback URLs, which need to be authorized. These are in the format:
http://mysite.com/blaize/oauth/
In the above,
Implementation
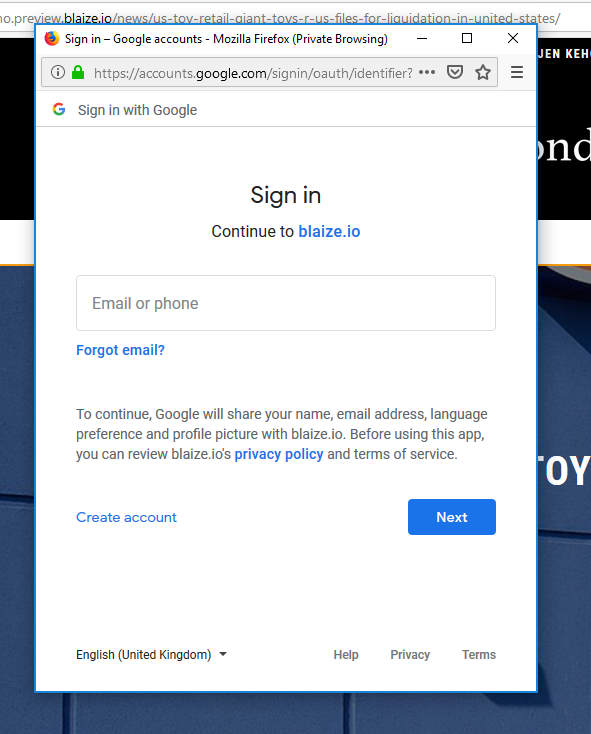
To start the flow you must open a window to the Zephr endpoint for the relevant OAuth 2.0 provider. You can do this with a simple HTML link or via JavaScript:
<a href="/blaize/oauth/google" target="\_blank">Sign in with Google</a>
window.open(
    "/blaize/oauth/google",
    "Sign in with Google",
    "menubar=no,location=yes,resizable=no,scrollbars=no" +
        ",status=no,width=500,height=600"
);
That will create a pop-up like this:

The second step is to listen for the callback at the end of the OAuth 2.0 flow, which must be implemented using JavaScript:
window.addEventListener("message", function(message) {
    if (message.data.action == "register") {

       registrationAuthenticationToken = message.data.stateKey;
       // userEmail = getUserEmail()
       // userAttributes = getUserAttributes()

       doRegister(registrationAuthenticationToken,
          userEmail,
          userAttributes);

    } else if (message.data.action == "login") {

       document.cookie = message.data.cookie;
       setTimeout(function() {
          window.location.reload();
       }, 20);

    }
});
For implementing the registration you could use the Zephr Public API:
async function doRegister(token, userEmail, userAttributes) {
    try {
       await fetch('/blaize/register', {
          method: 'POST',
          headers: {
             'Content-Type': 'application/json',
             'Accept': 'application/json',
       },
       body: JSON.stringify({
       “identifiers”:{
       },
       “validators”:{
           “token\_exchange”:“541bc348-635d-4446-9fb7-a7ee1e6e36e4"
       },
       “attributes”:{
       }
    }
    .then(response => {
       if (response.status === 200) {
          return response.json()
       } else {
          throw new Error(response.statusText);
       }
    });

       setTimeout(function () {
          window.location.reload();
       }, 20);
    } catch (err) {
       // Handle errors
       return console.log(err);
    }
}